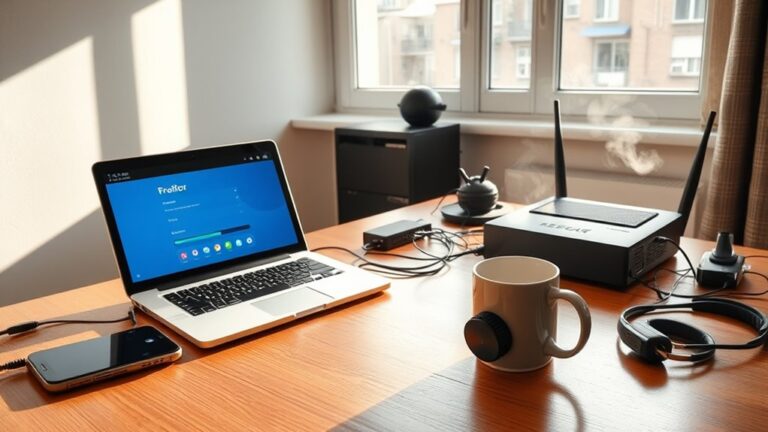
Set up a reliable home phone by picking a VoIP provider that fits your needs (RingCentral, Ooma, Dialpad), confirming your internet can handle calls (aim 25+ Mbps down, 10+ up; fiber ideal), and enabling router QoS. Unbox and match cables: RJ45 to router, RJ11 to phone jack, power to DC. Connect modem-router-adapter in order, test dial tone and first call, then enable voicemail, IVR, and porting. If you want whole-home jacks and fixes, keep going.
Key Takeaways
- Verify your internet speed, latency, and jitter; aim for 25+ Mbps down, 10+ Mbps up, and document any outages.
- Unbox and identify cables: RJ11 to LINE/WALL, RJ45 Ethernet to router, and correct power adapter to DC input.
- Connect modem, router, then VoIP adapter in order; update router firmware and enable QoS to prioritize voice traffic.
- Test call quality via your provider portal; adjust bandwidth, wiring, or QoS if you hear jitter, echo, or drops.
- Choose features and provider fit: IVR, call queues, voicemail transcription, number porting, and hardware compatibility for home or business needs.
Choosing the Right VoIP Service and Equipment
Before you pick a VoIP provider, define your must-haves: call quality, core home features (voicemail transcription, number porting, simultaneous call handling), and any business-grade tools you’ll actually use. Rank providers by value and fit. Many reputable options exist, and there’s no single best choice, though RingCentral is known for comprehensive features.
If you want plug-and-play simplicity with optional desk phones, Ooma’s home-focused lineup is hard to beat. Prefer a full UCaaS bundle with strong AI and low pricing? Dialpad stands out. Need global reach and admin depth? RingCentral delivers. For budget multi-country calling, Zoom’s plans are compelling, while GoTo Connect suits unlimited international calling with negotiable business pricing.
Evaluate call handling strategies like multi-level IVR, call queues, and granular monitoring if you’ll grow beyond basic residential needs. Prioritize audio quality enhancements—AI noise reduction, HD options—and confirm hardware: router-connected adapters or WiFi/4G base units.
Verifying Internet Speed and Network Requirements
Before you install, quantify your minimum bandwidth needs per concurrent call and confirm both upload and download capacity meet or exceed them with headroom.
Run speed tests during typical use to verify latency under 90 ms, jitter under 30 ms, and packet loss below 1%, prioritizing wired connections. For VoIP reliability, ensure your firewall/router has the required open ports (5060 TCP/UDP, 5004 UDP, 3478-3479 UDP, 16348-32768 UDP).
Track results over multiple days to confirm stability, and plan QoS or VLANs if margins are thin.
Minimum Bandwidth Needs
A reliable VoIP home phone needs modest but consistent bandwidth, and you can verify yours in minutes. Focus on bandwidth planning and monitoring call quality rather than chasing headline speeds. Plain voice calls use about 80–100 kbps per concurrent call in both directions; codecs and HD settings raise that. Upload capacity is critical. Many homes now have dozens of connected devices, so plan for multiple devices using bandwidth at the same time.
1) Calculate your needs:
- Allocate 100 kbps up/down per simultaneous call.
- Example: 5 calls on G.729 need ~215 kbps; 10 calls need ~1–1.25 Mbps.
2) Match your plan:
- For typical homes, 25+ Mbps download with 10+ Mbps upload is ample.
- For many users/devices, target 100 Mbps down and strong upload; fiber’s symmetrical speeds are ideal.
3) Separate voice from heavier traffic:
- Voice uses far less bandwidth than streaming or big downloads.
- Video calls demand 0.5–4 Mbps down and 1–2 Mbps up.
Network Stability Checks
Speed and stability, not just headline megabits, determine whether your home phone sounds clear every time. Start your network performance assessment with a wired Speedtest. It auto-picks a nearby server and measures ping, jitter, and throughput using a modified trimean, giving you a realistic median view. Disable VPNs, close background apps, and pause streaming. Power off other devices to see your line’s true capacity. Ookla’s global testing network uses servers worldwide to minimize hops so your latency reflects real‑world performance.
| Metric | What it shows | Action |
|---|---|---|
| Ping | Responsiveness | Aim low ms; investigate routing if high |
| Jitter | Consistency | Reduce WiFi noise; prefer Ethernet |
| Download/Upload | Capacity | Compare to plan; note median trends |
| Uptime | Availability | Document outages for ISP support |
Run tests at different times, then pursue bandwidth optimization: relocate router, switch channels, or upgrade gear. Consistently low results signal provider or wiring issues—log timestamps and server names for escalations.
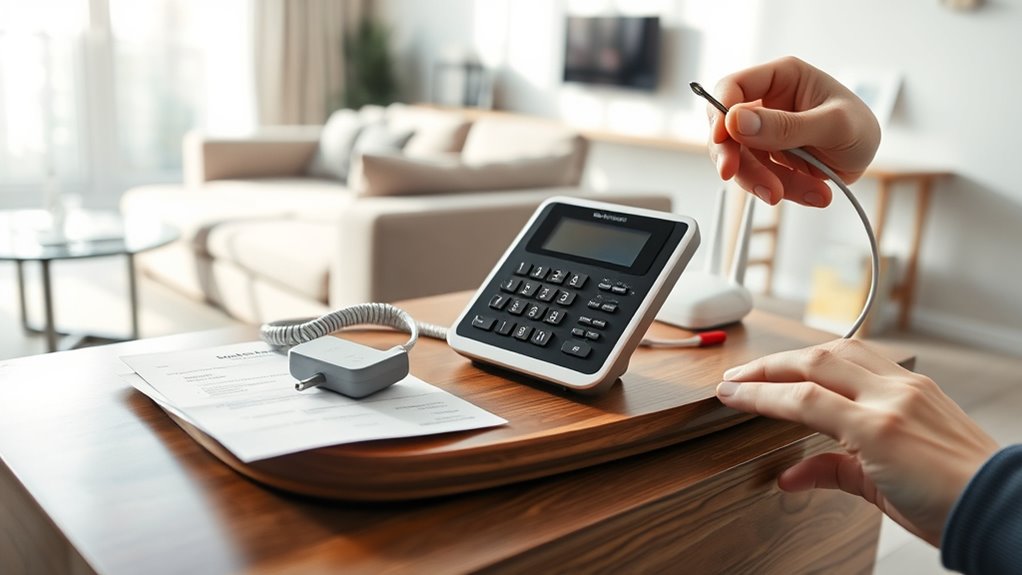
Unboxing and Identifying Cables and Ports
Start by laying out the box contents: base station/charging cradle, one or more handsets, battery packs, power adapter, and the RJ11 phone cable (plus Ethernet or USB on VoIP/hybrid models). For rugged VoIP handsets like the Yealink W59R, remember it pairs with a W60P base and connects to a chargeable base for charging and Ethernet connectivity. Identify ports on the base: RJ11 labeled LINE/WALL for the wall jack, PHONE for pass-through devices, power input, and—on VoIP—RJ45 Ethernet and sometimes USB.
Match cables to ports by size and label: RJ11 (smaller than Ethernet) to LINE, power adapter to DC input, Ethernet (RJ45) only for VoIP, and align battery notches before seating.
What’s in Box
Before you plug anything in, lay out the box contents and verify each item. Do quick accessory identification against the checklist: phone hardware first, then power, connectivity, and docs. You may have a ClearCaptions Blue phone, an Ooma Telo Base Station, or a Consumer Cellular Home Phone Base. Confirm the handset with cord, adjustable stand, and—if included—two antennas for the Consumer Cellular unit.
Look for power pieces: the Blue-specific AC adapter, Ooma’s standard power cord, and the Consumer Cellular backup battery with a bottom battery compartment. Note the green power indicator on the top panel. For dependable call quality later, remember most VoIP providers recommend at least 100 Kbps per line.
For connectivity, locate the 14-foot RJ-11, the gray satin phone cord, a flat RJ-45 Ethernet, a line splitter, and two DSL filters. Pull documentation: Quick Start “Start Here,” manuals, warranty, consent/MRF, wall-mount kit, checklists, and DECT pairing info.
- Verify phone hardware assemblies
- Separate power accessories
- Sort connectivity and documentation
Ports and Cable IDS
Ready to match cables to ports? Start by checking Phone port compatibility on your wall jack or base station. A 6P2C or 6P4C label signals modular RJ ports. RJ11 uses 2 contacts for one line, RJ14 uses 4 for two lines, and RJ25 uses all 6 for three lines. That’s the core of Telephony cable configurations. For data or Ethernet runs, remember that Twisted Pair cables like Cat5e or Cat6 use 8P8C (often called RJ45) connectors and have category and fire-rating markings.
Identify cables next. Look for “2-pair” on the sheath for two-line capacity. Internal cables feel flexible; external ones say “outdoor” or “weatherproof” and have thicker jackets. Flat cords tuck under carpets, coiled cords suit handsets, and round cables handle in‑wall or outdoor runs.
Use color codes to verify lines: red/green = line 1 (tip/ring), black/yellow = line 2. RJ11 cords often show yellow, green, red, black conductors. Check gauge markings: 22–26 AWG.
Connecting Modem, Router, and VoIP Adapter
A reliable VoIP setup hinges on wiring the modem, router, and adapter in the right order and powering them correctly. Start with modem optimization: confirm it’s online and note if it has built‑in VoIP (no adapter needed). For best results, ensure your router firmware is current and enable QoS to prioritize VoIP traffic.
Proceed to router configuration: guarantee stable internet and at least 100 kbps per call, then enable QoS to prioritize voice. Power off all gear before cabling.
1) Connect the router’s LAN port to the VoIP adapter’s WAN/Internet (often the blue port) with Ethernet. If no router, connect the modem directly to the adapter.
2) Power on modem, then router, then the adapter. Wait 3–5 minutes; LEDs flash during initialization and turn solid when registered. The adapter may reboot twice.
3) Verify SIP ports 5060/5061, NAT traversal, and UPnP/port forwarding. Place a quick test call; fix credentials or firewall blocks if registration fails.
Wiring the Home Phone Base and RJ11 Jacks
You’ll start by selecting Category 3 or better cable and matching color pairs to the correct screw posts on the RJ11 jacks. Make sure to choose a home phone service type that fits your needs and budget by comparing availability, features, and pricing. Next, connect line one using white/blue to green and blue/white to red, keep the jacket inside the jack body, and secure conductors with a punch tool. Finally, reconnect the modular plug, test for a clean dial tone at each jack, and troubleshoot interference or miswires if the tone’s absent.
Choosing the Right Cables
Before you crimp or plug anything in, choose cables and connectors that match your phone setup and environment. Start with cable gauges: 24 AWG is today’s standard; 22 AWG lowers conductor resistance for longer runs or marginal lines. For wall runs, pick round cable or CW1308; for mixed indoor/outdoor paths, use CW1308B. Keep flat cords for short device jumpers, and reserve coiled cords for handsets (RJ9/RJ22). Don’t mistake RJ45 for telephony. Outdoor telephone cables are thicker and weather-resistant, making them suitable for between buildings or underground runs.
- Select environment-ready jackets: indoor PVC for protected spaces; outdoor-rated, UV- and moisture-resistant sheaths for exposure; LSZH when safety codes demand low smoke.
- Match connector families: RJ11 for single-line, RJ14 for two lines, RJ25 for three; RJ12 fits RJ11 jacks but not vice versa.
- Verify electrical specs: conductor resistance ≤97.8 Ω/km, insulation ≥50 MΩ/km, capacitance balance limits.
Connecting RJ11 Jacks
With the right cables and connectors chosen, start wiring the base and wall jacks by landing the primary line on the center pins of the RJ11. Align the plug with the hook clip down; pin 3 is Ring (red), pin 4 is Tip (green). Follow proper rj11 wiring procedures: seat the cable jacket well into the jack, match colors to terminal posts, and tighten screw terminals so the metal forks bite clean copper.
If you’re using Cat5e/Cat6, place the blue/white pair on line 1 (white to green post), and orange/white on line 2 if needed. Keep secondary pairs (yellow/black or orange/white) parked or trimmed. Anticipate common rj11 installation issues: reversed tip/ring, loose conductors, misreading pin numbers, or crossed jack internals. Use adapters for RJ14 or RJ25 multi-line breakouts.
Testing Dial Tone
Even a perfect crimp won’t help if the line’s dead, so start by verifying dial tone at the demarcation point. Find the NID—a gray 6×9 box near the power meter—or an interior unit in a basement or closet; fiber users should locate the ONT. Kill power to all CPE, unplug every phone, modem, fax, and satellite interface, and wait 30 seconds. Use a corded phone to run demarc testing procedures at the labeled test jack.
1) Open the NID with a screwdriver, plug into the test jack, and listen at least 10 seconds. Clear tone means the provider’s side is good; no tone requires a technician.
2) If tone exists at demarc but not inside, begin troubleshooting dial tone issues jack-by-jack.
3) Reconnect devices individually; isolate faulty gear or wiring.
Powering On and Waiting for Device Registration
Two quick steps get you powered and ready to register. Insert the battery, seat the handset in its cradle, and connect the base to AC power and the wall jack. Charge fully to avoid initial setup issues and battery replacement concerns skewing results. Keep the handset 1–3 feet from the base.
- Hold Find/Locator for 3–10 seconds; watch for beeps or flashing LEDs indicating registration mode (about 120 seconds).
- On the handset, go to Settings > Register Handset, enter 0000 if asked, then press #. You’ll see “searching…” while it syncs.
| Action | Indicator |
|---|---|
| Base in reg mode | LED/beep continuous |
| Handset searching | “searching…” |
| Success | Tone + HANDSET # |
| Failure | No tone/message |
If it fails after 10–30 seconds, recharge briefly, try again, or deregister old handsets.
Testing Dial Tone and First Call
Your handset’s registered and charged, so confirm the line works before placing real calls. Start by checking wire positioning and that every cord seats firmly in the wall jack and base. Place receivers on-hook, then use a known good corded phone to benchmark the dial tone. If you hear crackle or silence, isolate gear: unplug all phones, faxes, and modems, test with one corded unit, then add devices back one at a time to catch signal disturbance.
1) NID test: open the exterior box, unplug the house side, connect your test phone to the test jack. Clear tone here means an internal issue; noise implicates the provider.
2) Voltage: measure ~48–52V DC; <1V suggests a line fault.
3) First call: verify two-way audio, ringing on inbound, and quiet background; document anomalies.
Enabling Whole-Home Phone Jack Distribution
Most homes can distribute a single phone line cleanly if you centralize, standardize, and test. Start at the NID; it’s your demarc. Create a centralized distribution point, then fan out CAT3 or CAT5E home runs to each room to reduce crosstalk and simplify troubleshooting.
Use RJ11 (6P4C) for single-line jacks, RJ14 for two lines, and RJ25 if you need three. Maintain color pairs: red/green for Line 1, black/white for auxiliary or Line 2. Staple cables properly—30 inches underground runs, 6–8 inches exterior—and strip about six inches of sheath at each jack.
Prefer star topology over daisy-chains, but you can loop when walls limit access. Use shielded cable and matching shielded connectors on long runs. Plan for Extending wired coverage while Integrating wireless backup via a base station.
Activating Number Transfer and Service Features
Before you cut over to a new provider, treat number transfer and feature activation as a staged process. Start by validating eligibility, then gather exact credentials: full number, account name, service address, account number, and the transfer PIN. Complete the LOA and submit the latest bill to prevent mismatches. Choose your initiation channel—portal, phone, or store—and confirm device compatibility and any account blocks.
1) Maintain continuity with call forwarding options: dial *72, enter the 10-digit destination, then #; listen for the confirmation tone. Use specialized codes for busy/no-answer scenarios.
2) Coordinate providers: clear outstanding balances, supply the transfer PIN, and wait for the Firm Order Confirmation (FOC) date.
3) After the port, verify calls in/out, configure voicemail, set multi-user access, monitor 48–72 hours, then proceed with the account deactivation process.
Troubleshooting No Line, Lights, and Call Quality Issues
When a home phone shows no line, odd lights, or poor call quality, approach it methodically: confirm the service is active and there’s no regional outage, then power cycle all equipment, including modems and base units. Test with a corded phone to rule out batteries. Inspect jacks for corrosion and cords for damage. For emergency call troubleshooting, verify dial tone and touch tone mode.
Isolate local network problems at the Network Interface Device: unplug the house wiring, plug a known-good corded phone into the NID test jack, and check for dial tone. Dial tone at the NID means the fault’s inside—perform a CPE reset by unplugging all devices, then reconnect one at a time. Confirm DSL filters on non-DSL devices, correct VoIP porting, reduce electronic interference, and reset cordless systems.
Frequently Asked Questions
Will My Phone Work During a Power Outage Without a Battery Backup?
Yes—if you’ve got traditional copper service and a corded phone, it should work without backup power. Fiber or VoIP won’t work unless you’ve installed a battery backup; battery life typically lasts 8–24 hours, depending on equipment.
Can I Use a Wired Phone to Avoid DECT Radiation Exposure?
Yes. Use a corded landline to minimize wired phone radiation exposure; it emits virtually none. Replace DECT with DECT phone alternatives like fully wired units. They’re reliable during outages, avoid constant pulsed emissions, and leverage existing wiring without signal-loss concerns.
How Do Third-Party Alarm Systems Connect to Voip Phone Lines?
They connect via ATAs, IP communicators, cellular modules, or Cisco voice gateways converting dialer tones to IP. You must verify compatibility with security systems, reconfigure monitoring accounts, meet service reliability requirements, and add power backup and wireless failover for outages.
What’s the Process to Transfer My Number if I’M Abroad?
Start by requesting home number portability with your current carrier, submit an LOA and recent bill, then country-specific codes (PAC/RIO). Expect 7–20 business days. If timing’s tight, use international call forwarding or park the number temporarily.
Do Fax Machines Work Reliably Over Voip Services?
No, fax machines don’t work reliably over VoIP. You face fax quality limitations from jitter, packet loss, and codec compression. Strict fax line requirements demand stable timing and bandwidth. Use PSTN lines or cloud fax services for dependable results.
Conclusion
You’ve taken a methodical path from choosing VoIP gear to activating service and troubleshooting. Now you can place clear calls, distribute dial tone across your home, and manage features with confidence. Keep your wiring map, login credentials, and speed-test benchmarks handy. If quality dips, validate bandwidth, QoS, cabling, and adapter LEDs before calling support. Revisit your router firmware and UPS protection periodically. With this setup, you’ve built a reliable, flexible home phone system that’s easy to maintain and scale.