Start by verifying your network: aim for <90 ms ping, minimal jitter, <1% loss, and at least 100–115 Kbps per call; use wired Ethernet, enable QoS, and disable SIP ALG. Next, pick a residential VoIP provider that supports SIP/RTP, E911, porting, and your ATA/app. Finally, connect your VoIP phone/ATA, enter SIP credentials, open ports (5060, 5004, 3478–3479, 16348–32768), enable TLS/SRTP, and test calls. If calls falter, QoS, firmware updates, and redundancy keep conversations crisp—there’s more.
Key Takeaways
- Check your internet: stable broadband, <150 ms latency, <30 ms jitter, <1% packet loss, and at least 100 kbps up/down per call.
- Pick a residential VoIP provider that supports SIP, E911, number porting, mobile apps, and your ATA or VoIP phone.
- Connect hardware: modem, VoIP‑ready router with QoS, then ATA/VoIP phone via Ethernet; avoid Wi‑Fi for reliability.
- Configure service: disable SIP ALG, open required ports, enter SIP credentials, enable TLS/SRTP, and create extensions and basic call routing.
- Test calls and troubleshoot: run VoIP tests, enable QoS, update firmware, switch to Ethernet, and consider LTE failover for outages.
Check Your Internet and Network Readiness
Before you plug in a phone, verify your internet and network can carry clear voice. Confirm a high-speed broadband link and plan network architecture considerations: prefer fiber, wired Ethernet, and a VoIP-ready router with QoS. Target <90 ms ping, minimal jitter, and <1% packet loss. Guarantee at least 115 Kbps per line; calculate capacity as (per-call bandwidth + overhead) × concurrent calls. Use 80 Kbps for G.711 or 24 Kbps for G.729. Run Speedtest.net and monitor jitter/packet loss. Test simultaneous calls while other traffic runs to validate QoS prioritization. Additionally, VoIP systems can integrate with business applications like CRM systems to enhance call analytics. Open firewall ports: 5060 TCP/UDP, 5004 UDP, 3478–3479 UDP, and 16348–32768 UDP; Cisco Linksys routers work well. Favor hardwired phones. For resilience, provision redundant internet connections to maintain call continuity.
Choose and Verify a Residential VoIP Provider
Now shortlist providers that actually sell residential plans and confirm they cover your calling needs (US/Canada unlimited, E911, porting, international options). Residential VoIP is typically much cheaper than traditional landline service while offering similar or better features. Next, verify compatibility: guarantee the ATA or router is supported, your number can be ported, and mobile apps work on your devices.
Finally, run QoS checks—confirm they support SIP/ RTP over your router, offer jitter/latency targets, and provide tools or guidance to prioritize voice traffic.
Residential Plan Availability
Start by shortlisting 3–5 reputable residential VoIP providers that match how you call and what you’ll pay. Compare plan scope, contract duration, billing structures, and verification options. For light use, Vonage U.S. & Canada 400 fits. For unlimited U.S./Canada, look at VOIPo, PhonePower, or Ooma. Need global reach? Consider Vonage World or international add-ons. Many top services emphasize robust infrastructure and proven uptime for consistent call quality.
- Prioritize unlimited vs metered minutes, E911, number porting, mobile apps, and paperless faxing.
- Check month-to-month vs multi‑year discounts; annual billing often saves 10–15%.
- Use guarantees to test: VOIPo (30 days), Axvoice (15 days).
| Provider | Notable Angle |
|---|---|
| Vonage | Tiered U.S./NA/World plans |
| VOIPo | Unlimited U.S./CA + 60 intl minutes |
| Ooma | Free Telo device, smart home tie-ins |
| PhonePower | Dual lines, rich feature set |
| Callcentric | Flexible, free inbound option |
Compatibility and Qos Checks
A quick reality check comes next: verify your internet, hardware, and provider settings can deliver clean voice. Run network diagnostics and speed tests at different times; you need ~0.1 Mbps upload per call, so 10 calls require 1 Mbps. Target at least 0.384 Mbps up/down; FCC’s 0.5 Mbps down is a baseline, not a goal. Confirm latency <150 ms, jitter low, and packet loss <1%. VoIP enables advanced features like voicemail-to-email and call forwarding, delivering more value than traditional lines for cost savings.
Check your router: enable QoS to prioritize VoIP, disable SIP ALG, open provider ports, and guarantee switches handle traffic without drops. PoE simplifies powering IP phones.
Validate device certification with your chosen provider. Confirm codecs, SIP support, and concurrent channel limits. Match softphone apps and headsets to platform specs. Register E911 with your accurate address. Some providers even bundle compatible desk phones.
Gather Essential Equipment and Accessories
First, confirm your connection can handle voice: target at least 100 kbps up/down per concurrent call, prefer wired Ethernet over Wi‑Fi, and run speed/jitter/packet‑loss tests. Validate device placement near your router to keep cords short and interference low. Plan connection redundancy with an LTE adapter for outages. Many providers can cut phone costs significantly by moving to VoIP, often reducing monthly bills by up to 60%.
Gather core network gear: a modem from your ISP and a router to manage traffic; a combined gateway is fine. Enable QoS to prioritize voice; businesses may prefer enterprise routers with VLANs and strong firewalls. Choose your endpoint: an ATA for traditional phones, a dedicated VoIP desk phone, or a softphone/mobile app. Add PoE switches to simplify power. For better audio, pick noise‑canceling headsets or conference phones. Keep network testing tools handy for ongoing verification.
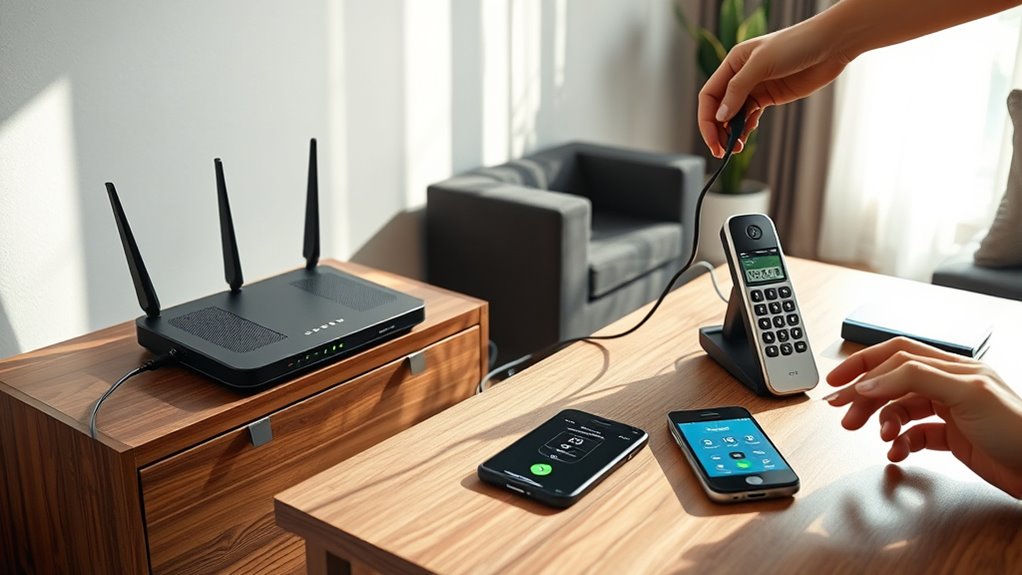
Step 1: Connect and Power Your VoIP Device
Start by choosing your hardware: a dedicated VoIP/IP phone or an ATA for your analog handset. Connect the device to your router or network port with an Ethernet cable, following any model-specific port instructions. Apply power (PoE or adapter), let it initialize, and confirm LEDs, IP assignment, and dial tone. For best results, ensure you have a strong and reliable internet connection to support consistent call quality.
Choose VoIP or ATA
Before you plug anything in, decide whether you’ll use a native VoIP phone or an ATA with your existing handset. A VoIP phone digitizes voice and connects directly, minimizing hardware and liberating features like call forwarding, voicemail-to-email, and app integration.
An ATA lets your analog phone join VoIP by converting signals; it’s often included with service and keeps your familiar handset.
Assess power and uptime. Both need constant electricity and internet. Plan backup power alternatives—UPS or PoE-capable gear—and verify outage redundancy options like provider failover to your mobile. With VoIP, you can typically get unlimited calling for a flat monthly rate, often costing less than traditional landlines.
Expect 100 kbps up/down per line for clean calls.
Choose VoIP phones for built-in controls and simpler setup. Pick ATA if you want to reuse phones cheaply. Either way, configure E911 details carefully.
Connect via Ethernet
One Ethernet cable does double duty: plug your VoIP phone’s LAN port into your router or switch, then feed your computer from the phone’s PC port. This dual-port design streamlines your home network topology and reduces clutter while keeping both devices online.
Use Cat5e or better. Cat5e supports 1 Gbps ethernet port speed and is sufficient for most homes; pick Cat6 if you need higher throughput or better noise immunity. Keep runs under 100 meters. Poor cable quality causes packet loss and choppy calls.
Connect the phone’s LAN to a properly provisioned switch port. If your network uses VLANs, that port should present a tagged voice VLAN and an untagged data VLAN; CDP/LLDP can help auto-identify the phone. Guarantee each workstation has a dedicated RJ-45 jack and structured cabling. In enterprise setups, switch ports for phones are configured with a voice VLAN and a native data VLAN so PCs and VoIP sets can share one drop while staying on separate networks.
Power and Initialize
Even with cabling in place, your VoIP phone won’t come alive until you apply power and let it initialize. Choose a power method: plug in the included adapter to a wall outlet and the phone’s power port, or use Power over Ethernet via a PoE switch or midspan injector. Confirm your network’s 802.3af/at support and power budget (24–48 V dc typical).
Press the physical power button if your model requires it. Watch the boot screen for progress indicators. Let the device complete DHCP acquisition; it may fall back to 192.168.1.2. After network discovery, the phone attempts server registration; wait for dial tone or registration OK. Before proceeding, make sure you have the necessary network settings like IP address, subnet mask, gateway, DNS, and any VLAN details from your administrator.
If you see “stuck on initializing,” start with power source troubleshooting, then perform initialization failure analysis: verify PoE, cabling, network, firmware, or factory reset.
Step 2: Configure Service and Register on the Network
Although the hardest part is choosing a provider, Step 2 is where you actually bring service online: configure your account, register your device, and align your network. Start in the portal: confirm account profile requirements, complete service provider registration, verify email, and note SIP credentials and server domain. Create extensions, set basic routing, and secure strong passwords. For an office deployment, remember that you’ll typically need a PBX Server connected to your network to manage extensions and call routing.
Open your phone or ATA web page via its IP. Enter SIP username, password, and server; or load the provider’s auto-provisioning URL. Save and reboot; allow any firmware update to finish. If your provider requires it, set port forwarding for SIP 5060 and RTP 10000–20000, or enable UPnP cautiously. Apply QoS and, on business LANs, a voice VLAN. Prefer static IP for PBX. Enable TLS/SRTP and adjust firewall rules.
Step 3: Test Calls and Optimize Performance
Ready to go live? Place a quick test call while running network diagnostics. Confirm at least 5 Mbps up/down and ~100 kbps per call in both directions. Check latency (<150 ms), jitter (<30 ms), and packet loss (<1%). Compare Wi‑Fi vs wired; if clarity swings, switch to Ethernet and position the router centrally.
Enable QoS to prioritize VoIP, and disable SIP ALG if calls sound inconsistent. For bandwidth optimization, cap background apps with NetBalancer or GlassWire. If your household streams heavily, consider a business‑class plan with 25–50 Mbps upload.
Tune DNS to speed call setup. Try app low‑bandwidth modes. Select codecs intentionally: G.711 for fidelity, G.729 or Opus for efficiency. Use a noise‑canceling headset, and prefer VoIP‑optimized routers with SIP/VLAN support.
Troubleshooting and Quality Improvements
With your test calls complete, turn to rapid troubleshooting and quality gains. Start with bandwidth troubleshooting: run VoIP speed and ping tests to quantify latency, jitter, and packet loss. If results sag during peak hours, shift heavy devices off the network or schedule calls strategically. Power-cycle the router, then prefer wired Ethernet over Wi‑Fi. Inspect Ethernet and power cables, verify the phone’s in Tel 1, and bypass splitters.
Harden the router: disable SIP ALG, enable QoS to prioritize VoIP, extend timeouts to 60+ seconds, and switch voice from UDP to TCP when reliability beats minimal delay. Apply router, OS, app, and handset firmware updates.
Pursue network topology optimization: avoid double‑NAT and multiple routers, fix NAT for VoIP, consider VoIP‑aware firewalls, and place the router to minimize interference.
Frequently Asked Questions
Can I Keep My Existing Home Phone Number When Switching to Voip?
Yes. You can retain your current phone number via number porting options. Keep your existing service active, submit your latest bill, account number, LOA, and PIN. Expect 5–10 business days; schedule cutover off-peak to minimize downtime.
How Do I Use Voip During a Power Outage?
Use VoIP by powering your modem/router and PoE switch with a battery backup, then fail over to a portable hotspot. Enable automatic call forwarding to mobile, use provider apps, and prioritize essential gear. Remember 911 limitations.
What Emergency 911 Limitations Exist With Residential Voip?
You face emergency services limitations: outages or power cuts disable 911, location may be wrong, and operators may lack your number. Expect latency concerns, possible transfers to third-party centers, and busy signals. Keep addresses updated, backup power, and a cellphone.
Are There Parental Controls for Blocking Specific Numbers or Times?
Yes. You can block specific numbers and enforce time-based limits. Use Qustodio or Bark for contact blocking and routines, Verizon Family for monitoring, and router or Google Family Link content filtering options with scheduled internet access to restrict VoIP times.
How Secure Are Voip Calls and Recordings at Home?
They’re as secure as your setup. Use strong encryption protocols: TLS for signaling, SRTP for call encryption and recordings. Segment VoIP traffic, close port 80, harden firewalls, update firmware, avoid public Wi‑Fi, and monitor logs for anomalies.
Conclusion
You’ve got everything you need to bring home internet calling online fast. Confirm your network’s ready, pick a reliable VoIP provider, and assemble the right gear. Connect and power the device, register the service, then run test calls. If audio falters, adjust QoS, swap Ethernet cables, or reposition hardware. Keep firmware updated and monitor jitter, latency, and packet loss. With these steps, you’ll lock in clear, consistent calls—and know exactly how to troubleshoot when performance dips.